PeopleFluent is pleased to announce the upcoming PeopleFluent Recruiting 22.03 update. This document describes the functionality of these new features, discusses their client impact, and provides detailed information about each. If you have any questions about the enhancements or the new features presented in this document, please contact your PeopleFluent representative.
Third-party Assessments
Summary
This enhancement allows administrators to add third-party assessments to candidates. Vendors supported for this update are SkillSurvey and HealthcareSource.
Details
PeopleFluent Recruiting now allows administrators to add third-party assessments to candidates.Once configured, assessments are available on the candidate record from the More menu.
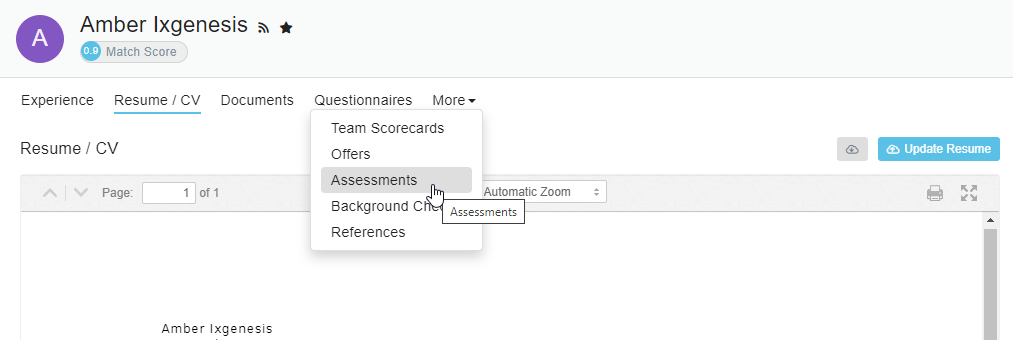
Figure: Assessment Item on the More Menu
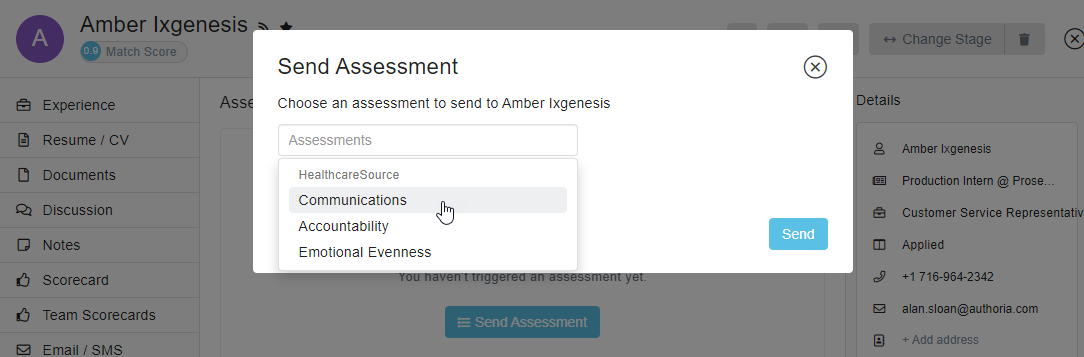
Figure: Example of Send Assessment Dialog Box
Completed assessments can be viewed from the candidate record.
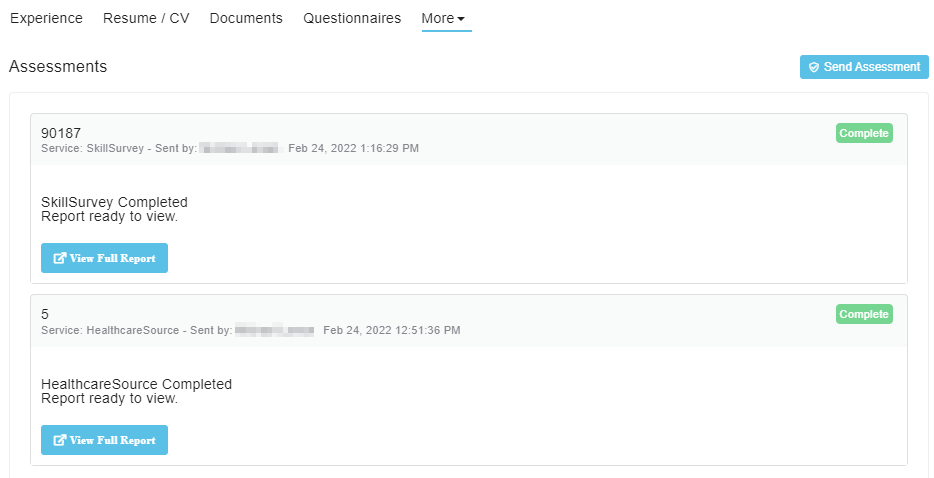
Figure: Completed Assessments
Configuration Requirements
PeopleFluent will need the details provided by vendors to properly configure each type of assessment. Requirements vary by vendor, but may include one or more of the following items:
- Reference IDs
- Account IDs
- Packages
- Required Custom Fields
For more information, contact your PeopleFluent representative.
PeopleFluent Configuration
The following section provides instructions for PeopleFluent personnel who are enabling and configuring third-party assessments for clients.
You must complete the following tasks before a client can begin using third-party assessments:
Enabling Third-Party Assessments
You must enable assessments in the Recruiting Console Admin.
To enable third-party assessments
- Log into the Recruiting Console Admin for the environment in which you want to enable assessments. See the table below for a list of URLs.
- In Company Search, enter the ID or friendly ID for the company and click Go. If found, the company's Details page opens.
- Click PeopleFluent.
- Click the Edit icon next to Has Colossus Assessments.
- Select the checkbox.
- Click the Save icon. You are now ready to add assessments.
Table: Recruiting Console Admin URLS per Environment
|
Environment |
URL |
| V1 - Test | https://console.test.recruiting.peoplefluent.net/dashboard |
| Prod - US | https://console.recruiting.peoplefluent.net/ |
| Prod - EU | https://console.recruiting.eu.peoplefluent.net/ |
Adding Vendor-required Custom Fields
Depending on the vendor, each assessment may require one or more custom fields for required data. The information the vendor provides to the client should include these fields and their corresponding values.
Adding an Assessment
Once enabled and custom fields are created, you are ready to add an assessment.
To add an assessment
- Go to the PeopleFluent page of the Recruiting Console Admin.
- In Colossus - Add Assessments, select an integration vendor.
- For each required field, enter the name and value, then click Add.
- If required, select custom fields from the dropdown list, then click Add Field.
- Click Save. If configured correctly, the new assessment appears in Enabled Assessments and the client should be able to add an assessment.
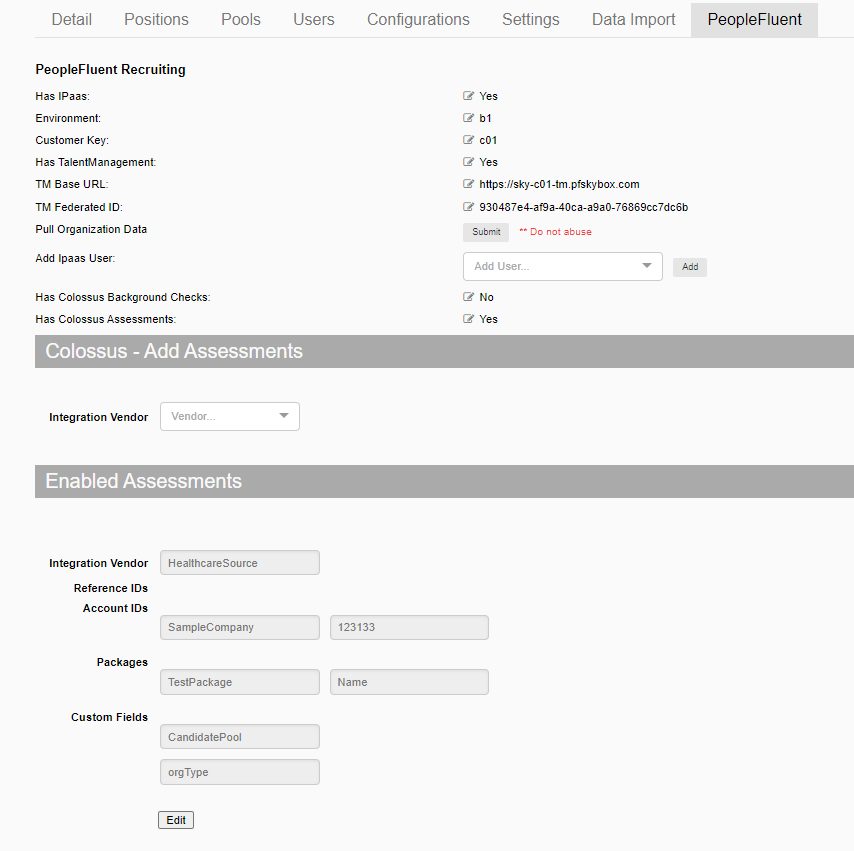
Figure: Enabled Assessments
Custom Field Improvements
Summary
This enhancement allows administrators to change the order of custom fields that appear on candidate and position records.
Details
In Recruiting Preferences, on the Custom Fields page, administrators can now reorder how custom fields and folders appear on the candidate or position record. To the right of the custom field name or folder, click the cross icon to drag and drop the item to the desired location within the list. Click Save Changes to see changes reflected on the candidate or position record.
Note: Folders must be expanded in order to drag and drop fields into them. Refresh your browser to view your changes on the candidate or position record.

Figure: Custom Candidate Fields